Getting Started
Introduction
Rise is a blockchain first platform where by all actions are secured and executed on-chain. Rise has blockchain smart-contracts on the Arbitrum optimistic rollup chain that control the flow of funds.

Integration Assistance 🤓
We're here to help, if you need any assistance on blockchain, wallets, or SIWE, please reach out to us by using the chat icon at the bottom right of the page or at [email protected]

1. Create a Rise Pay Account
A Rise Pay Payer account is required to get started paying your people. Sign up, complete onboarding and you'll receive a RiseID
Custom Configurations
If you're integrating to our API, your needs may be a little different than a regular user. Contact us to configure settings that will make the integration event better.
- Pre-signed Professional Service Agreements (PSA)
- Disable Anonymous users
- Disable Invoices from being sent to your account
- Disable Charge-backs
RiseID
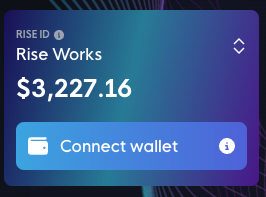
The RiseID is a smart contract that is your account within the Rise Pay platform. It hold your balance, account attributes, privileges and permissions - who can execute payments on the account. RiseID's unique ID looks like so...
0xA35b2F326F07a7C92BedB0D318C237F30948E425 or 0xA35b...E425 as the abbreviated value.
The address may also include a prefix arb1:0xA35b2F326F07a7C92BedB0D318C237F30948E425 This is an indicator to the user that this address should only be used on the Arbitrum One blockchain. The prefix should be removed when you are using the address as a reference as most sites aren't aware of this prefix pattern.
2. Permissions
To authenticate and send requests to the Rise API, you first need to get an Ethereum wallet and assign it as a Delegate to your RiseID on the Rise Pay platform. This will grant the wallet permission to send transactions. It cannot transfer ownership of the RiseID as that requires the owner wallet of the RiseID to execute. The owner wallet is likely a Rise Security Key (RSK) that you created during onboarding, but for those that are crypto savvy, they may have swapped to a third party wallet.
3. Authenticate
Rise uses SIWE for authentication, you can know more about it here
By using SIWE we can leverage the blockchain wallets power to ensure authentication & authorization with our system. You must sign a Rise generated message with your wallet and use the signature and the message to build your own bearer token.
Authentication example:
const ethers = require('ethers');
const axios = require('axios');
const w = new ethers.Wallet(env.WALLET_PRIVATE_KEY)
const baseURL = 'https://b2b-api.staging-riseworks.io/v1'

const auth = async () => {
  // Get message to be signed
  const { data: { data: { message, wallet } } } = await axios.get(
    `${baseURL}/auth/api/siwe`, {
      params: {  wallet: w.address }
    }
  )
  if (wallet !== w.address) throw 'Invalid wallet returned by api'
  // Sign message using your wallet
  const signature = await w.signMessage(message)
  console.log(`signature is :  ${signature}`);
  console.log(`message is :  ${message}`);
  // Build your bearer token
  const { data } = await axios.post(
    `${baseURL}/auth/api/siwe`, {
      wallet: w.address,
      message,
      signature
    }
  )
  const bearerToken = data.data.token
  console.log(`bearer token is : ${bearerToken}`);
  const authorization = `Bearer ${bearerToken}`
  console.log(`Authorization is :  ${authorization}`);
  // Create axios api instance
  const api = axios.create({
    baseURL,
    headers: {
      'Authorization': authorization,
      'Content-Type': 'application/json'
    }
  })

  // Don't forget the trailing slash "/" in the URL
  const testCall = await api.get('/teams/').then(r => r.data)
  console.log(testCall)
  return api
}
auth();
Impersonate
You can also use our SIWE to impersonate a manager from any company if you have access to a delegate or the owner wallet of the company RiseID, all you have to do is specify the email of the manager and the company RiseID address you want to impersonate and make sure the wallet signing the message is the owner or a delegate of the RiseID:
const ethers = require('ethers');
const axios = require('axios');
const w = new ethers.Wallet(env.WALLET_PRIVATE_KEY)
const baseURL = 'https://b2b-api.staging-riseworks.io/v1'

const auth = async () => {
  // Get message to be signed
  const { data: { data: { message, wallet } } } = await axios.get(
    `${baseURL}/auth/api/siwe`, {
      params: {
        wallet: w.address, // Must be a delegate or owner of the RiseID bellow
        rise_id: '0x1234...', // Company RiseID
        impersonate: '[email protected]', // Company manager email
      }
    }
  )
  // all the rest is the same as the above example ...
4. Invite
You need to invite your Payees to the Rise Platform. Payees will create Rise accounts, complete KYC and AML checks, then be given a RiseID which you can pay. You can invite your users via the Rise Pay app or via the Rise API. Once your users have a RiseID, they can be paid.
After sending an invite to your users, there may be a day or two before they're active on the platform. Check the Teams API to see if your users have completed onboarding and are ready to be paid.
5. Deposit
You'll need to deposit funds into your account before you can start paying your users. You can deposit funds via a Bank Wire or Crypto.
Deposits in Staging Environment
We've created a convenient way for users to credit their account in Staging. At the top right of the web app, you'll find a Mint USDC button.

- Copy your RiseID address from the RiseID page
- Click Mint USDC
- Paste your RiseID address
- Remove the
arb4:from the input. This is not needed and used to indicate which network you're interacting with. - Browse to the Fund page
You should now see a USDC balance as a funding option on the Fund page. This transfers testing USDC to your Rise Account balance. Enter an amount within your available test USDC, submit and see your Rise Balance increase in a few moments.


❗There are no test banking transactions in the Staging environment
6. Payment
To execute a payment you must inform Rise of the payment parameters, and then sign the data Rise api gives you, and finally send the signature to execute the payment. Make sure the wallet used to execute the RiseID payment is either the owner or delegate of the RiseID
const pay = async () => {
  const api = await auth()

	// Send the payment to Rise and receive the typedData as response
  const salt = '1234567890'
  const { data: { data: typedData } } = await api.put('/payments/pay', {
    wallet: w.address,
    rise_id: REPLACE_WITH_RISE_ID, // riseid address
    payee: REPLACE_WITH_PAYEE_RISE_ID, // payee address
    amount: '10000000',
    salt
  })

  // Sign the typed data
  const types = { ...typedData.types }
  delete types.EIP712Domain
  const signature = await w.signTypedData(typedData.domain, types, typedData.message)

	// Send the payment parameters, the signature and the message to execute the payment
  const { data: { data: tx } } = await api.post('/payments/pay', {
    wallet: w.address,
    rise_id: REPLACE_WITH_RISE_ID, // riseid address
    payee: REPLACE_WITH_PAYEE_RISE_ID, // payee address
    amount: '10000000', // amount is in 1e6 (USDC decimals)
    salt,
    signature,
    request: typedData.message
  })
  // The response will be a transaction on the blockchain
  console.log('Result', tx)
}
Updated 3 months ago
