The two things that must be true before the Rise B2B API will answer you: your wallet is authorized on your RiseID, and your company is enabled for the API.
Both are set up in the app, and until both are done the API answers with a 403, even when your code and credentials are perfect:
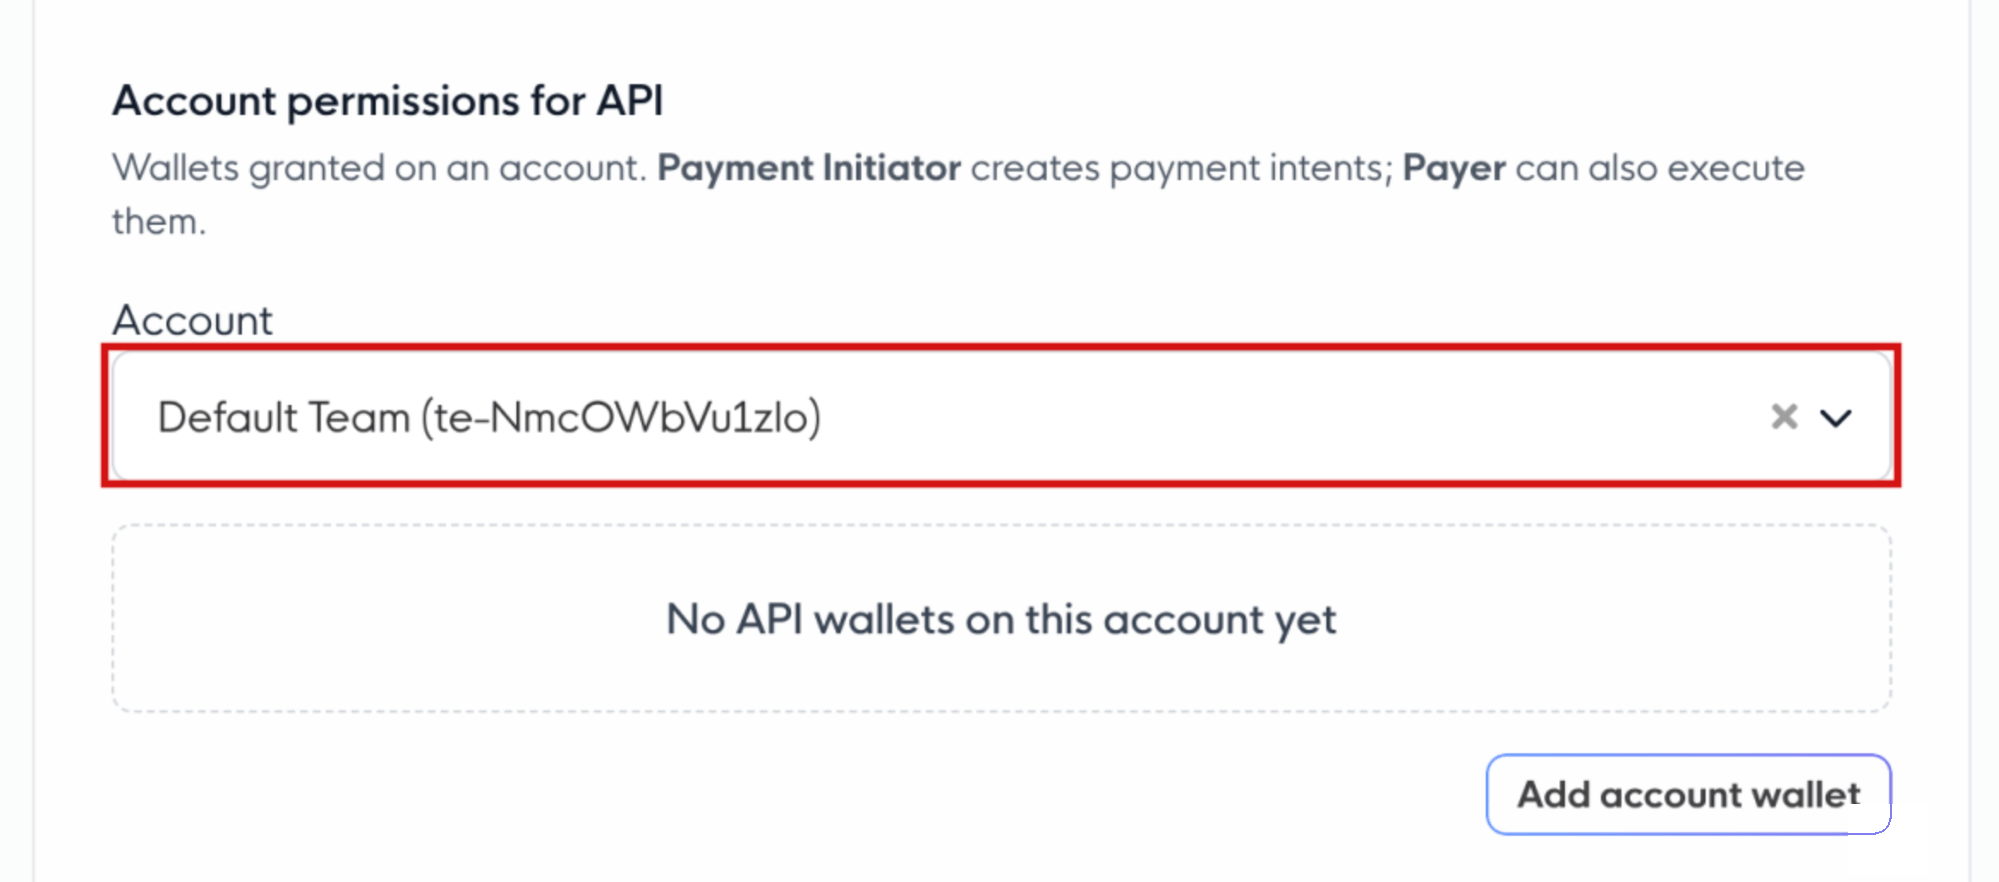
Your API wallet is authorized on your RiseID. You add the wallet’s public address on the API Config page, where it gets the Viewer role. On your RiseID it can only sign you in. To create payment intents, the same wallet also needs a role on the account you pay from (see What your API session can do).
You have enabled your company for the B2B API. The API is off by default. You switch it on per environment and company, so staging and production are enabled separately.
You do both on the same API Config page, so open that first, then work through the two sections below. If you get stuck, the reference at the end matches each error to its fix.
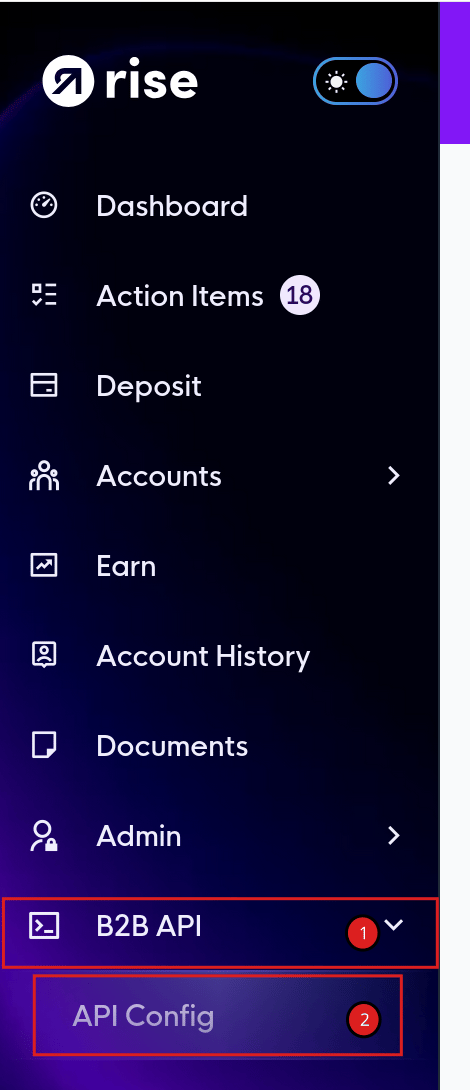
Every step below is managed here, so open it first and come back whenever a step says to. Switch into the workspace for the company you’re integrating, then in the left menu expand B2B API and open API Config.
Only the company’s registered owner can manage the API Config page. If you’re integrating on behalf of someone else, the owner has to make these changes.
Expand B2B API in the left menu. 2. Open API Config.
The wallet you sign in with has to be authorized on your personal RiseID before the login handshake will hand you a token. You add its public address on the API Config page, where it’s granted the Viewer role. That’s deliberate: Viewer lets the wallet sign you in but not act on your RiseID. To create payment intents, give the same wallet a role on the account under Scoped, low-privilege credentials. It then signs those intents, but it can’t execute payments or move funds through the API.
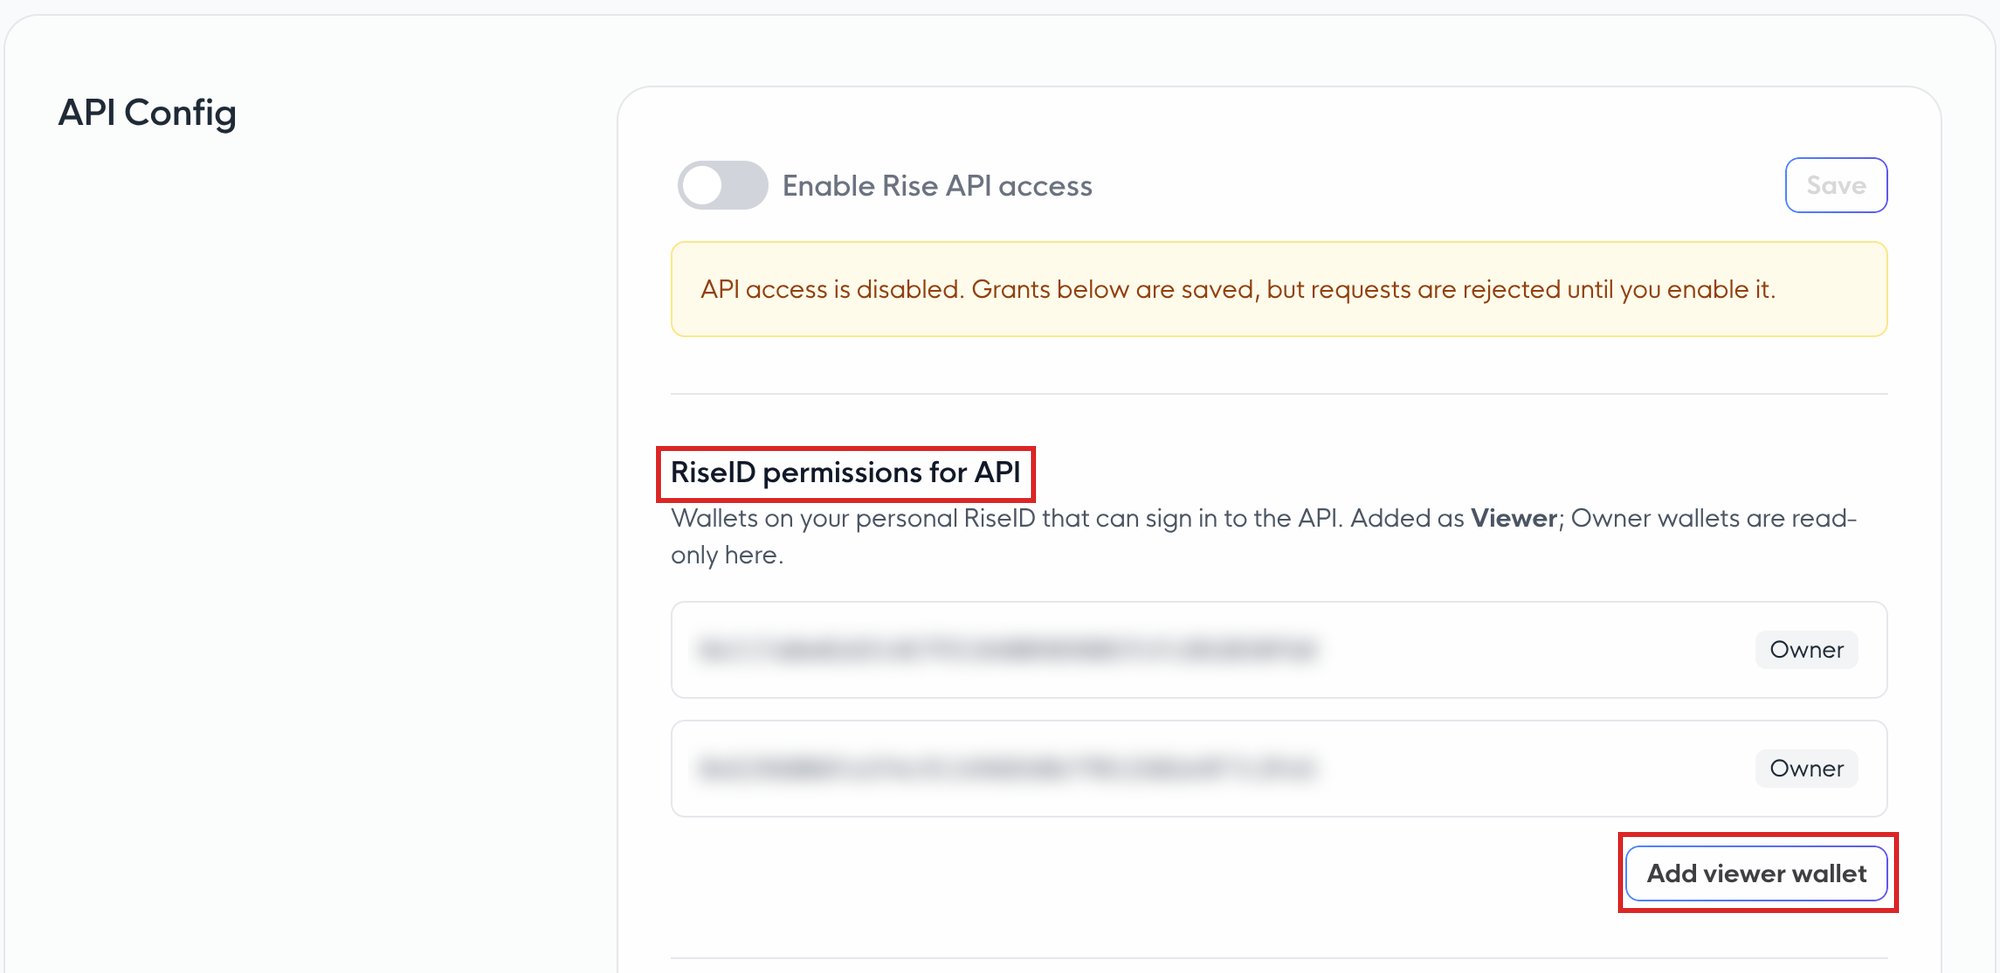
On the API Config page, under RiseID permissions for API, click Add viewer wallet.
1
Add the wallet
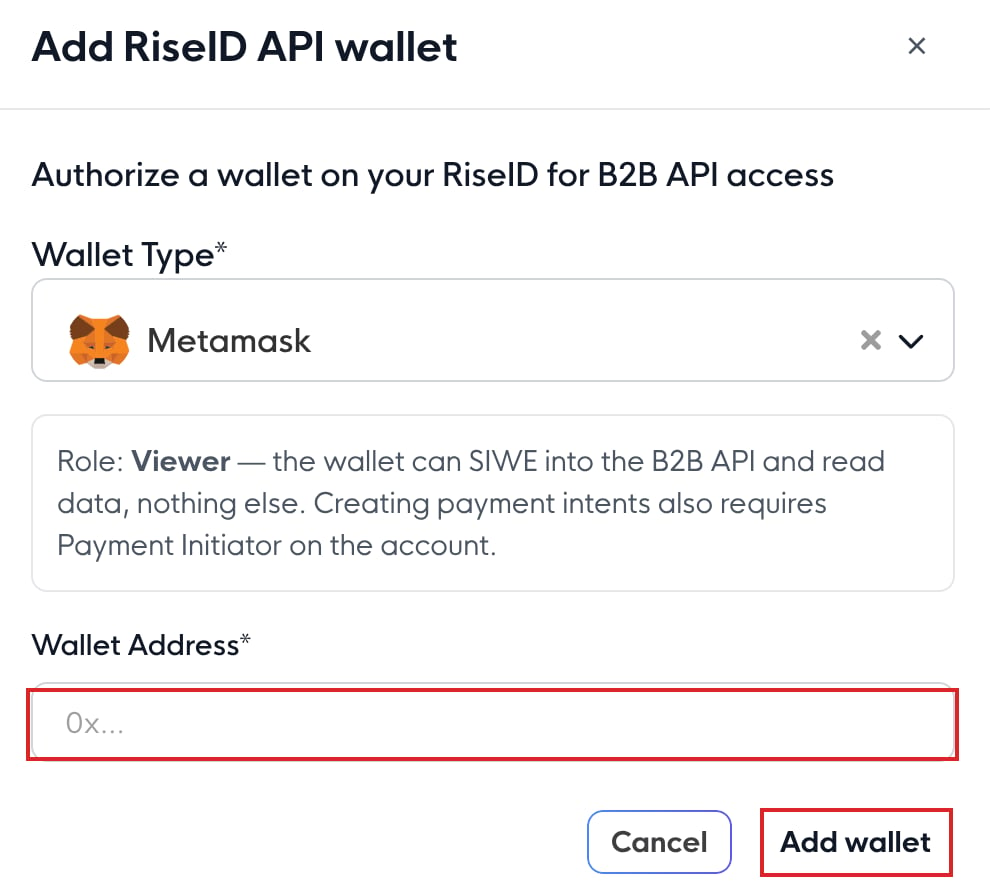
Under RiseID permissions for API, click Add viewer wallet. In the Add RiseID API wallet dialog, paste the wallet’s public address (never its private key) and click Add wallet. It’s added with the Viewer role. Don’t have a wallet yet? See Creating your first wallet.
2
Sign the change
Sign the prompt with a Rise security key or wallet that is already authorized on your RiseID. This records the new wallet’s Viewer role on-chain.
3
Wait for confirmation
Give the transaction a moment to confirm before you log in. Until it’s confirmed, the handshake still sees the wallet as unauthorized and returns a 403.
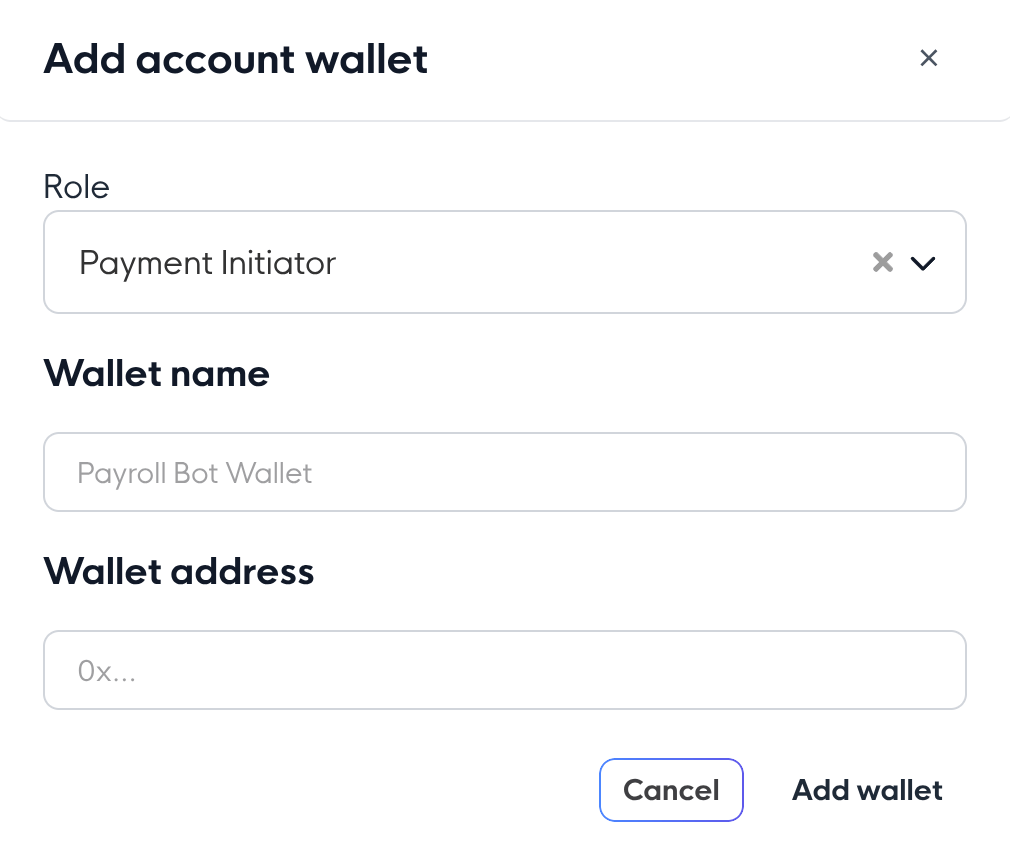
The Add RiseID API wallet dialog: the role is fixed to Viewer. Paste the address and click Add wallet.
This wallet signs you in and signs your payment intents, so guard its private key. Keep the key in a secret manager or HSM, never in code, a repo, a log, or anything client-side, because anyone who holds it can use the API as you until you remove the wallet on the API Config page. And never give your API wallet the Owner, Payer, or Treasurer role on your RiseID: those roles can sign payments and withdrawals, so a leaked key would move money. Use a Viewer wallet for the session.
Use a dedicated wallet for API operations rather than one holding funds. It needs no balance, since Rise pays the gas. See Secondary Wallets.
The B2B API is off by default. You turn it on yourself in the app, no support request needed. This is a per-company setting, and staging and production are enabled separately.
1
Open API Config for the right company
Open the API Config page in the workspace of the company you want to enable. This setting is per-company and per-environment, so pick the right one.
2
Turn on Rise API access
Toggle Enable Rise API access.
3
Save and verify
Click Save. You’ll be prompted to confirm the change with your passkey and wallet. Once it goes through, the company is enabled for this environment.
Turn on Enable Rise API access, then click Save.
Staging and production are enabled independently. They run on separate databases, so enabling your company in staging does not enable it in production. Turn on each environment you plan to use. Most teams enable staging first to build against, then production before going live.
Until this is done, calls that resolve to your company return:
{ "success": false, "data": "Company is not enabled for B2B API access", "error_code": "B2B_ACCESS_DENIED"}
The login handshake authenticates a user, so the riseid you send is your personal (user) RiseID, not a company or team RiseID, and not your Rise Account address. Sending anything else returns 404 No entity found with riseid <id>.To find it in the app:
1
Open My Profile
Sign in to app.riseworks.io, open the user menu on the top bar (or the Account section of the left menu), and go to My Profile.
2
Copy the Rise ID
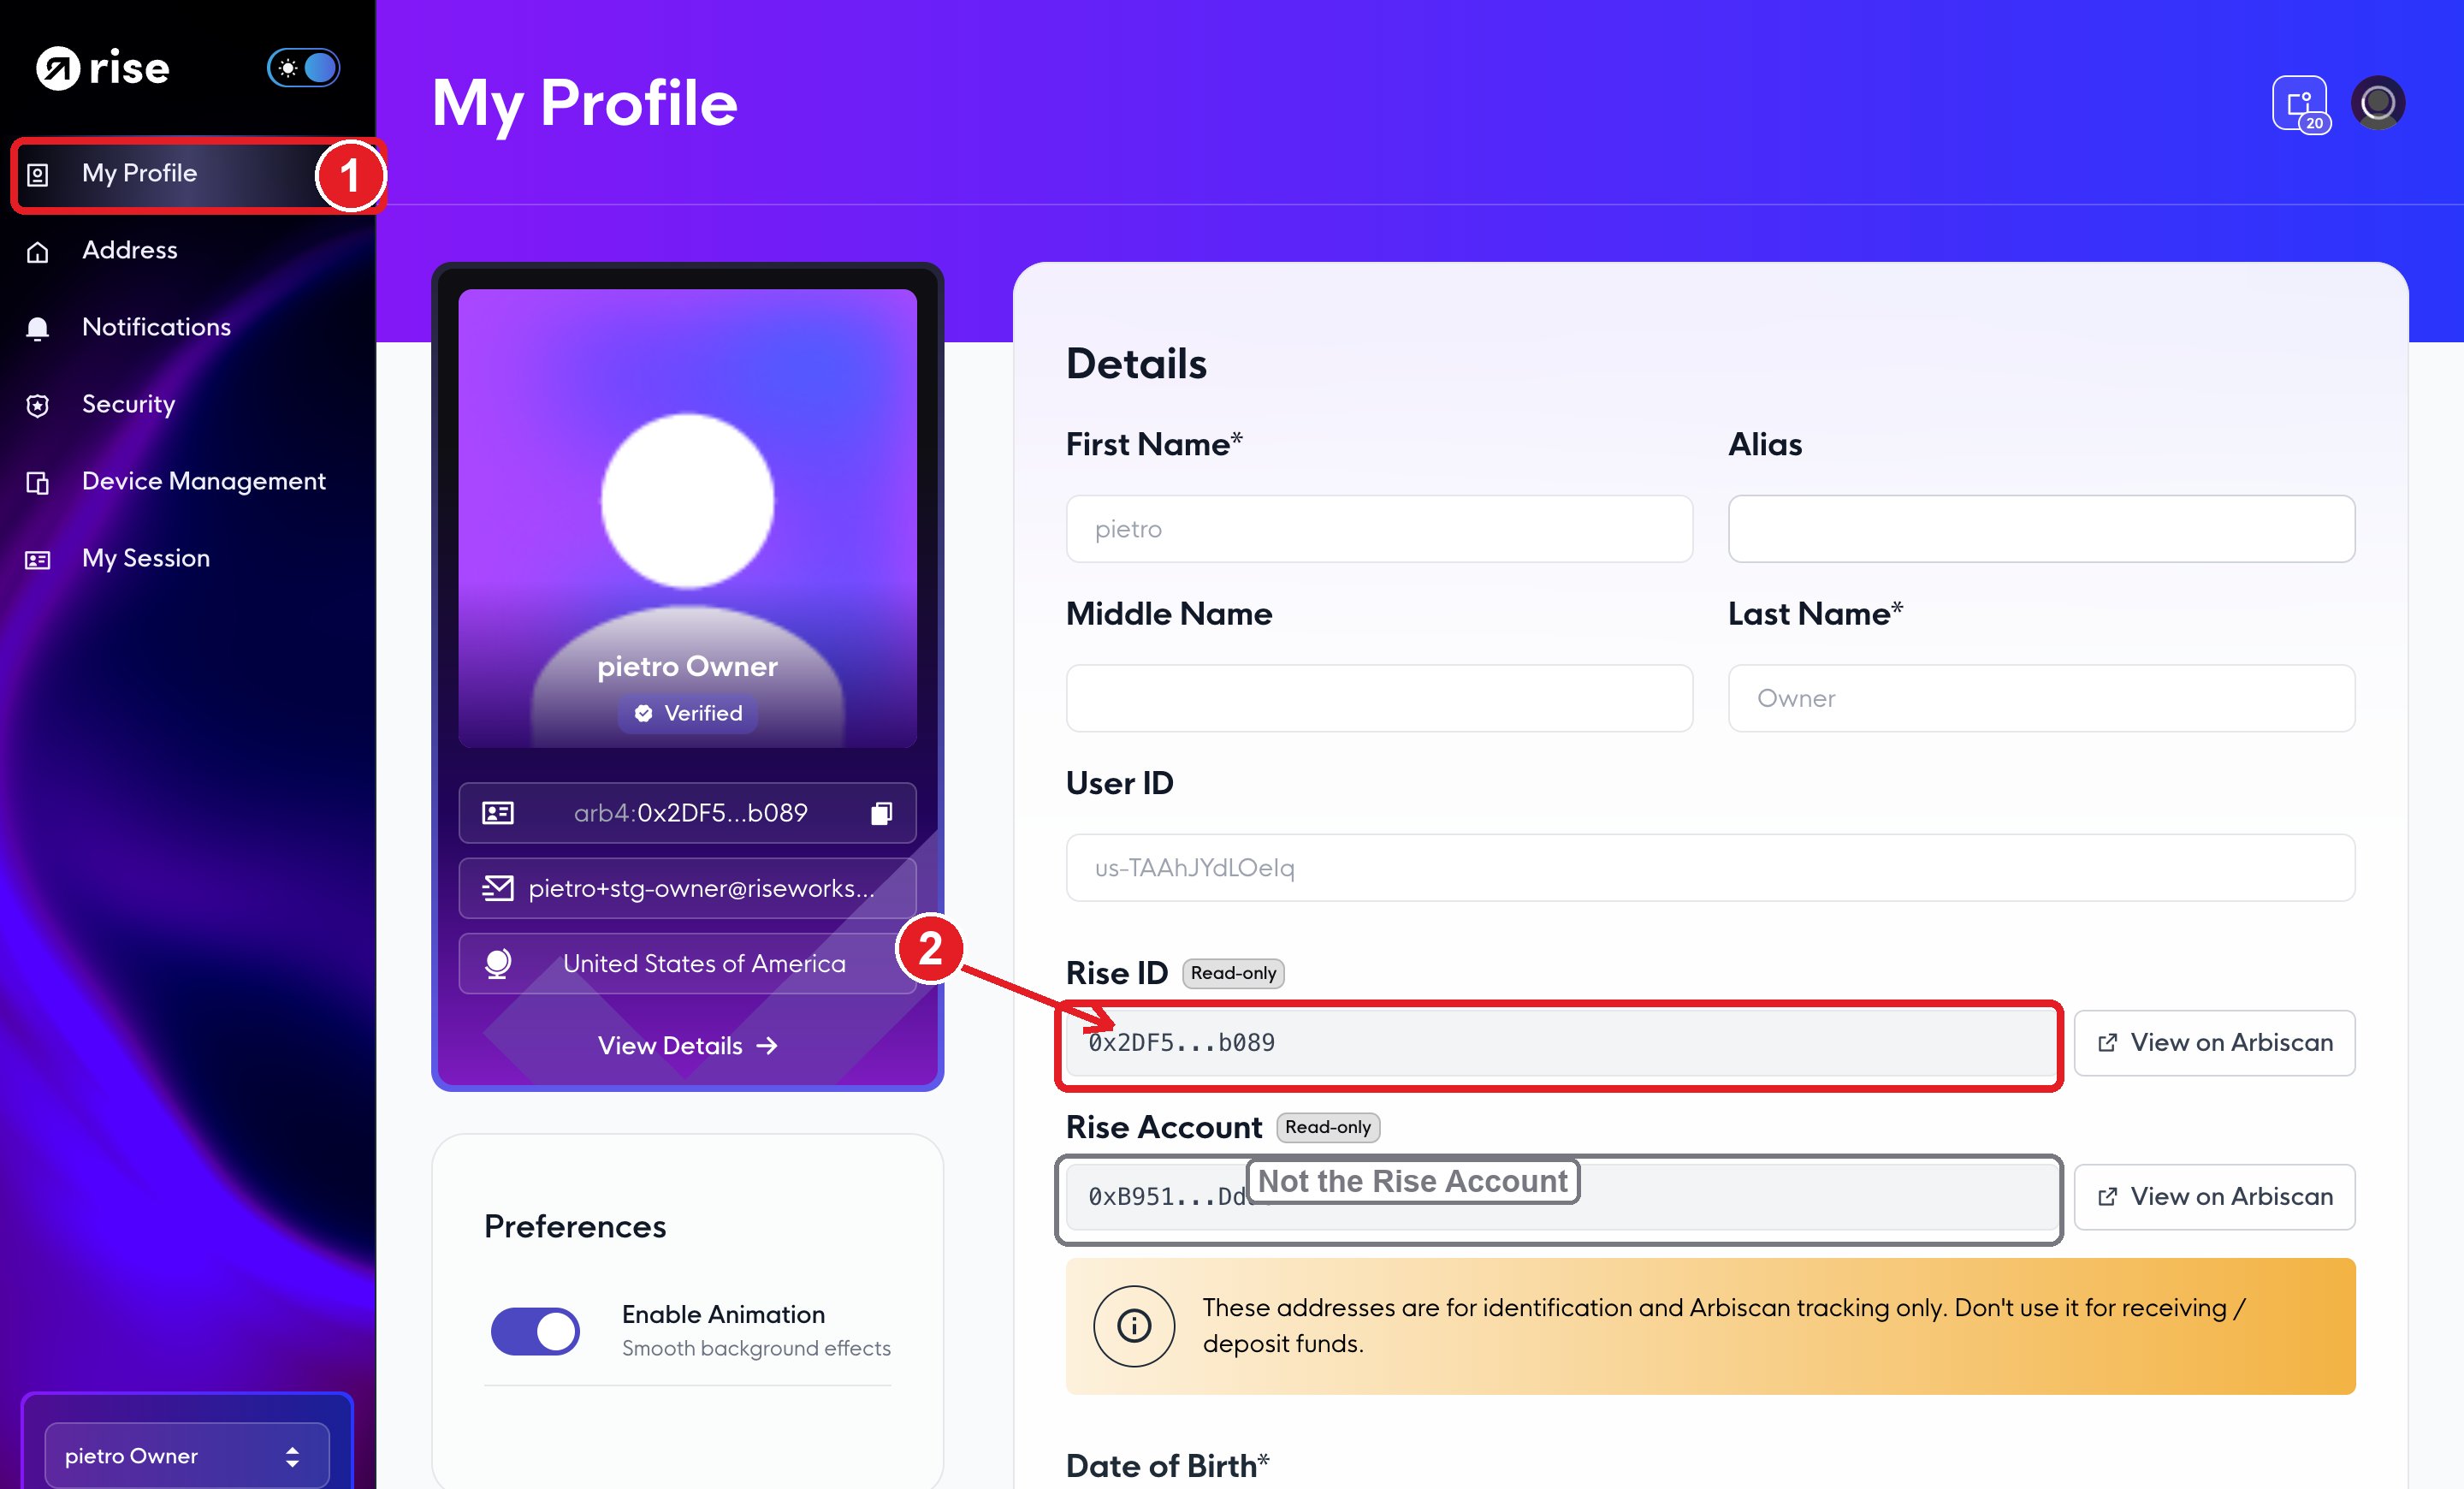
Under Details, copy the value in the Rise ID field. It’s a 42-character address that starts with 0x, for example 0x2DF5...b089.
Open My Profile from the left menu. 2. Under Details, copy the Rise ID (the bare 0x), not the Rise Account below it.
The same page shows a second address labelled Rise Account. That is not your RiseID and it won’t authenticate. Use the field labelled Rise ID. Mixing the two up is a common cause of the 404 above.
Send the bare 0x address, with no prefix. The Rise ID card in the sidebar shows the same value with a network prefix (arb4:0x…). Drop the arb4: (or eth: / arb1:) part, and the API matches on the plain 0x… shown in the Rise ID field. It is also not one of your us-, co-, or te- nanoids. A prefixed value or a nanoid is the single most common cause of 404 No entity found with riseid.
Company and team RiseIDs are used for API operations like payments and balances, addressed by their co- / te- nanoids rather than by the login handshake. See RiseID for how the identity hierarchy fits together.
This is the Viewer wallet you authorized under RiseID permissions for API in Authorize your API wallet. You pass its address as wallet and sign the SIWE challenge with its private key. To confirm which wallets can sign in, open the API Config page and check RiseID permissions for API.Once you have both values, run the authentication handshake. A successful GET /v2/me confirms the wallet is authorized and the token is valid; a scoped call like fetching a team or balance confirms your company is enabled for the environment.
To create payment intents, or whenever you work with a third-party provider, give your API wallet an account-level scoped credential with the Payment Initiator role instead of sharing a wallet that can move funds. A Payment Initiator can create payment intents, which then have to be approved before they’re processed, so the provider can queue payments without being able to move money on its own.
Your API session is the Viewer wallet you signed in with. Viewer on your RiseID only signs you in. What the session can do with an account depends on the role that same wallet holds on the account, and that wallet signs the payment intent. Signing an intent doesn’t execute a payment: an approver executes it in the app.
Role of your sign-in wallet on the account
Read (GET)
Create payment intents (pay_now: false)
Pay immediately (pay_now: true)
None or Viewer
✅
❌ 403
❌ 403
Payment Initiator, Payer, Owner, or Treasurer
✅
✅
❌ 403
Recommended: give the wallet Payment Initiator. It’s the least-privileged role that can create intents. Payer, Owner, and Treasurer also work, but they can move funds from the account outside the API.
The two prerequisites are checked at different points, which is why they fail differently:
The wallet-role check runs during the login handshake, so a wrong or unauthorized wallet fails at login. Company enablement is checked later, on the first request that names a company or team, so an un-enabled company can still log in and read /v2/me but gets a 403 the moment it touches a team or payment.